Student Registration
Have you completed all the steps to becoming an MCC student?
- If not, go to our Become A Student page for a list of steps.
If you have met with an advisor and have your classes planned in Student Planning, you can register by clicking the Register button (see below for example) in Student Planning.

To register, you will use your MyMCC (or Student Planning) account, which is activated within 24 hours of the Admissions Office fully admitting you.
Signing in to MyMCC/Student Planning
- Go to MyMCC.
- Log in by entering the first letter of your first name (lowercase), the first letter of your last name (lowercase), and your seven-digit MCC ID.
 Example: Ima Student (MCC ID 0128043) would be is0128043. If you do not know your MCC ID, you can find it on your Highlander Student ID Card, admissions email, all official MCC paperwork, or you can recover it on the MyMCC Sign In page using the "Forgot your user name?" link.
- Click the Password field and enter your MCC password.
- Click the "Sign In" button.
- First-time students. If you are logging into MyMCC for the first time, use the password you created. If you did not create your password within 24 hours of receiving the email notification with the "Create Password" link, please Reset Your Password now.
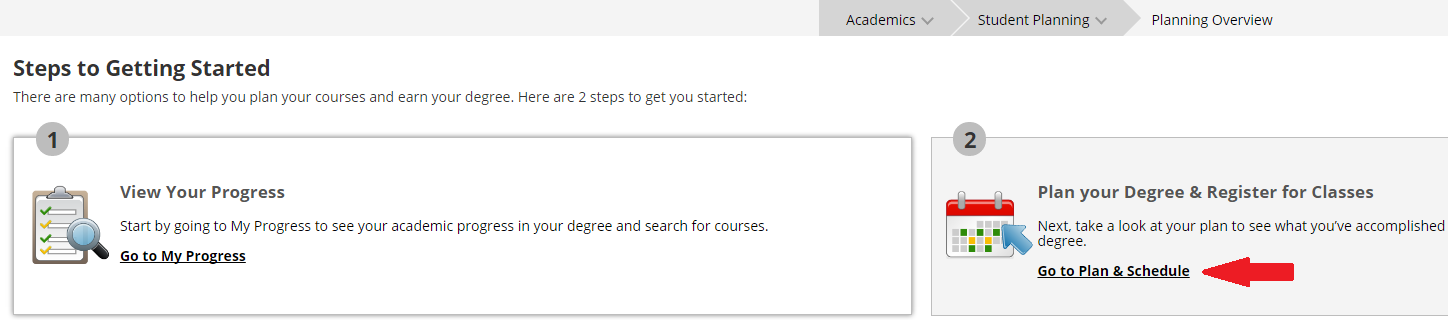
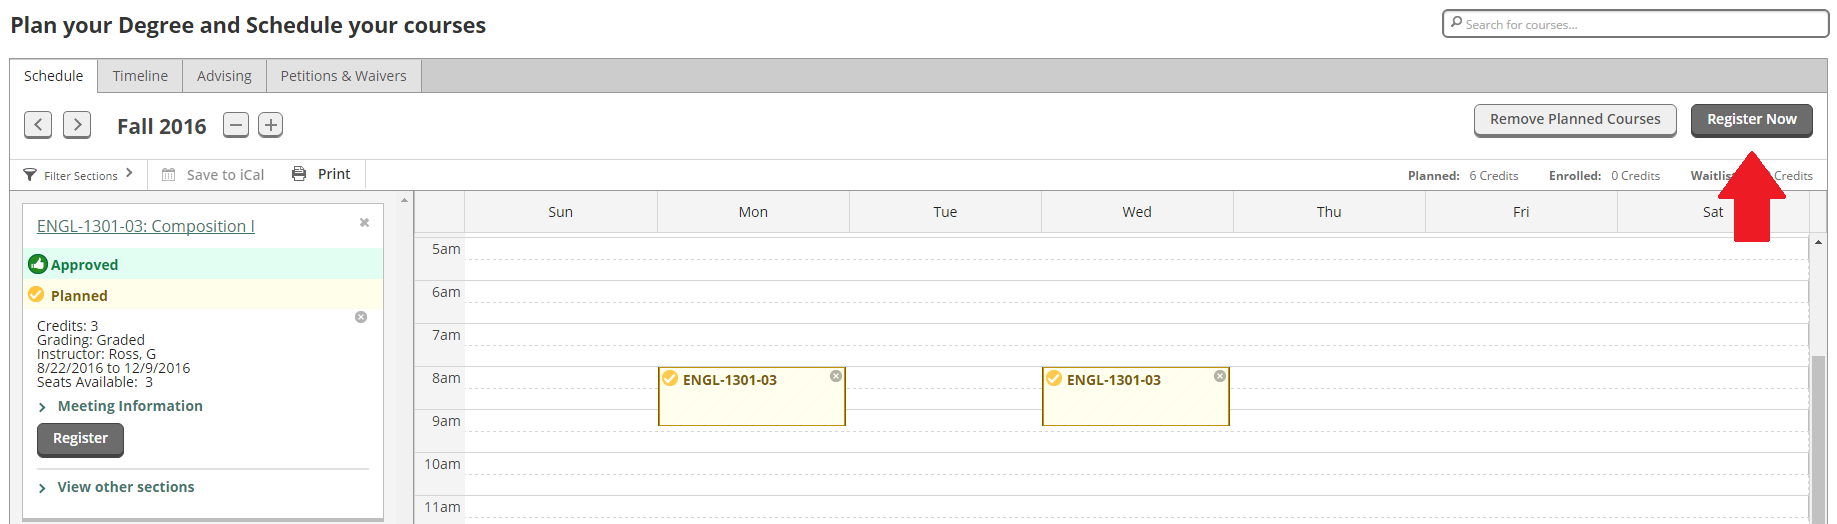
Registering for Courses in Student Planning
- Click on "Student Planning."
- Click on "Go to Plan & Schedule" (see red arrow below).
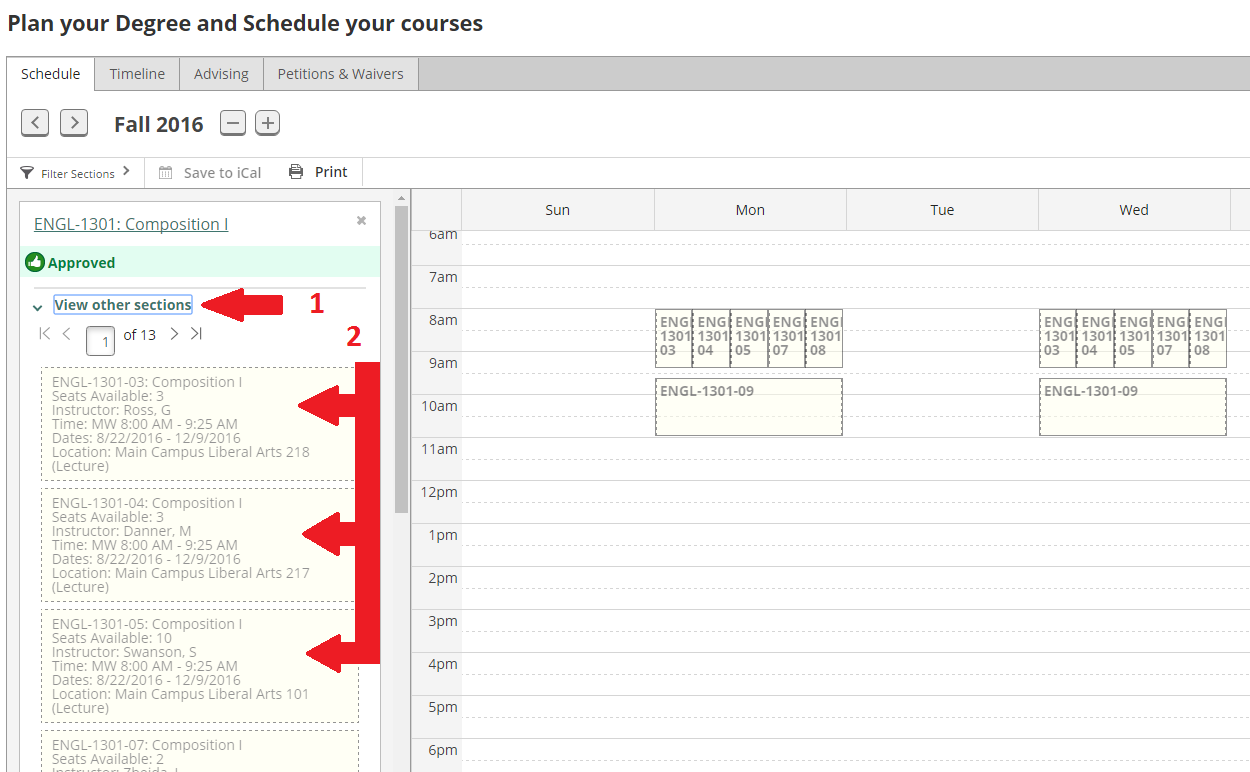
- To schedule courses, click "View other sections" under each course to see what days and times they are available.
- Once courses have been approved by your advisor, you may now select sections.
- As you hover over each section, it will appear on your calendar so you can see any schedule conflicts.
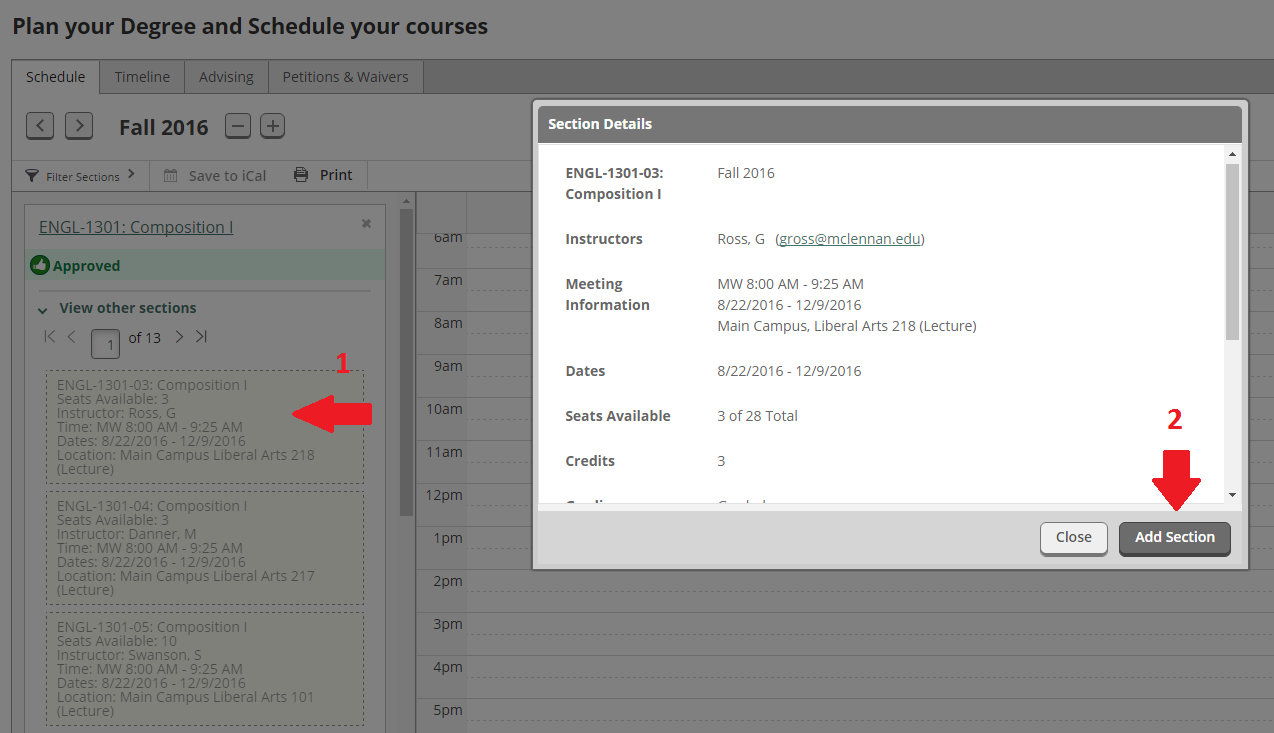
- Click the course and then click "Add Section to Schedule".
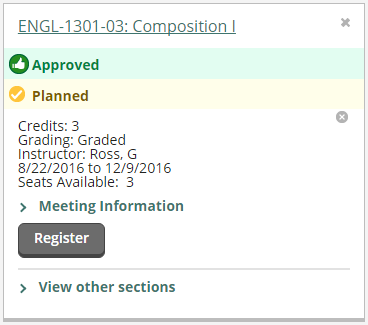
- The course will remain in your calendar and it will show as "Planned" on the sidebar.
- Once you have chosen your sections for the semester, click the "Register Now" button on the Plan & Schedule page.
- Please note, if you use the "Register" button under the course, you will have to register for each section individually.
- To finalize registration, you must accept the Terms & Conditions for the semester by following the instructions here.
- Please note, if the Required Agreements for the applicable semester are not present after registering, sign out of MyMCC, wait 15 minutes, and then retry.
- Once successfully registered, your courses will appear in all green.
- Yellow courses are planned but not registered.
- Red courses are denied (contact your Advisor for more information regarding denied courses).
If you have any technical issues, please contact MCC Tech Support. If you have any questions regarding the registration process, please contact Highlander Central.